Well, let there be a little MORE light. The Wife mentioned that the plastic cover tended to cut down on the light on the layout. And David Popp, on Model Railroader Video Plus, just installed some more LED rope lights on his layout. So, why not give it a try on the Blacktop Crossing?
Actually, the lighting is a good bit better and without noticeable shadows. This is about 16 feed of rope light from Walmart installed with one "factory" clip and several zipties.
BIL did say that he thought of a Christmas tree?!?!
Thursday, July 16, 2020
Wednesday, July 15, 2020
18, Count 'Em
Here's a challenge. I think I count 18 Clever Bros structures -- either the model as designed or some slight modification or just use of textures and parts -- on the layout. See if you agree! You've seen this "aerial" view before:
·
Woodyard shed – Yard Shanty
·
3 Company Houses – Small Company House
·
Horse Barn -- Furniture Factory file, Wood Shed
·
Military Warehouse -- Quonset Hut
·
Little Wooden Church – Rural Church
·
Crossing Tower -– Crossing Tower
·
Storage/House Trailer -- Construction Trailer
·
Ramp, Dock, Stairs -- Jackson Volume 3
·
Doctors’ Office – Photo Studio
·
Backyard Shed – Danged if I know, but it’s from
Clever Bros
·
Cotton Gin -- Old Brick Texture for the boiler
house exterior, Vertical Seam Sheet Metal texture for the unloading shed
exterior walls, and Cedar Shakes for the roofs
·
Cotton Broker Office – adapted from Clever by
Paul Egri
·
‘Baccer Barn -- Tool Shop, Creeky Roofing
foundation, Paul Egri
·
Ebenezer Grill -- Weathered Red Clapboard
texture
·
Boiler house -- Small Brick Machine Shop and
Paul Egri
·
Smokestack -- Old Brick (Colonial Brick?)
texture
Monday, July 13, 2020
Back from the Edge
Seems the track on the right side of the layout is precariously close to the edge. It's not hard to imagine a loco or boxcar tipping over that edge. Maybe it would be a good preventative move to put up a bit of a guardrail over there. Wonder if there is a little hardboard sitting around that could be used? Why yes, yes there is!
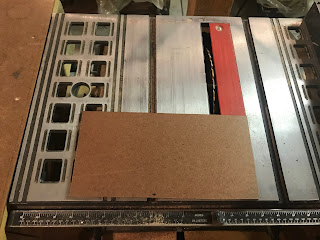
So, with a little effort, a roughly 6-inch by 12-inch rectangle was cut out with top corners rounded off. As close as the rail is to the edge, there may not be room for the little bit of overhang that might be needed if the hardboard is mounted directly to the sides of the layout table. Maybe a couple of lengths of 1/2 inch "trim" could offset it enough.
Some olive and leather spray paint was supposed to help the guardrail blend in; maybe it did.
BIL checked out the left side and mentioned it was pretty close, too. Just happened to have some hardboard on the table saw and before you knew it, another but somewhat smaller guardrail was in place.
And here is the cover with two additional pulleys on the ceiling so the far corner twine does not bind with the frame when the cover is raised.
Wednesday, July 8, 2020
Hunkered Down
So, maybe "hunkered down" is an old Southern (region not railway) description, but that's about what it's been like around here since early March. But sometimes progress can be made. An afternoon's effort:
A few 1X2's to be cut to about 6" over the size of the layout -- two at 82" and two at 54".
Glue, pocket screws, and corner braces give a frame.
Add eye screws, rope, and stapled plastic sheet to get a cover.
Glue, pocket screws, and corner braces give a frame.
Add eye screws, rope, and stapled plastic sheet to get a cover.
Four hooks in the ceiling with pulleys attached and a cleat, and voila: a removable layout cover:
May need to add a large eye screw or pulley to direct the far ropes off of the cover on the near end. No big deal. . . . Will remove the two vertical supports (one visible at left of this view) and maybe strengthen backdrop. Attention to backdrop might not be needed if suspended cover doesn't hang on it. All around satisfactory solution for prior makeshift cover.
While up on the ladder installing the pulleys, took a couple of "aerial" photographs. Not sure which shows best.
Subscribe to:
Comments (Atom)


